platform-specific/cc26x0-cc13x0/cc26x0-web-demo
CC26xx Web Demo Readme
This demo project combines a number of web-based applications aiming to demonstrate the CC26xx capability. The applications are:
A network-based UART
A client for 6lbr
A CoAP server
An MQTT client
A web server which can be used to display sensor readings but also to configure MQTT functionality
The example has been configured to run for all CC26xx-based boards.
To change between target boards, follow the instructions in the documentation.
Do not forget to make clean when switching between the boards.
Specifically for some older CC2650 SensorTags, you may also need to change
project-conf.h such that SENSORTAG_CC2650_REV_1_2_0 is defined as 1. To
check if your sensortag is one of those older ones, look for “REV: 1.2”
printed on the PCB. There may also be a sticker that reads “HW Rev 1.2.0”. An
indication that you may need to do this is if you get a “Could not open flash
to load config” error on device startup.
You can disable some of those individual components by changing the respective
defines in project-conf.h. For instance, to disable the CoAP functionality,
set #define CC26XX_WEB_DEMO_CONF_COAP_SERVER 0. The web server cannot be
disabled, all other aforementioned applications can.
Network UART (net-uart)
This example only makes sense if you are using the Srf or if you have taken the sensortag out of its case and you have it connected over JTAG to the Srf.
The net-uart does two things:
When you type a string to the UART console, the string will be sent verbatim to a remote UDP port 7777 listener. This can be for example a netcat listener on a linux or OS X PC:
nc -6ulkw 1 7777The net-uart also listens to UDP port 7777 and when it receives a string over UDP, it will print it verbatim over UART.
The example will initially send packets to a hard-coded IPv6 address. This can be changed very easily by entering a different IPv6 address to the console. Thus, when the serial input string is an IPv6 address, it will not be sent as any other string would, but instead it will configure the example to send to a different remote address. This new IPv6 address is not persistent across device reboots.
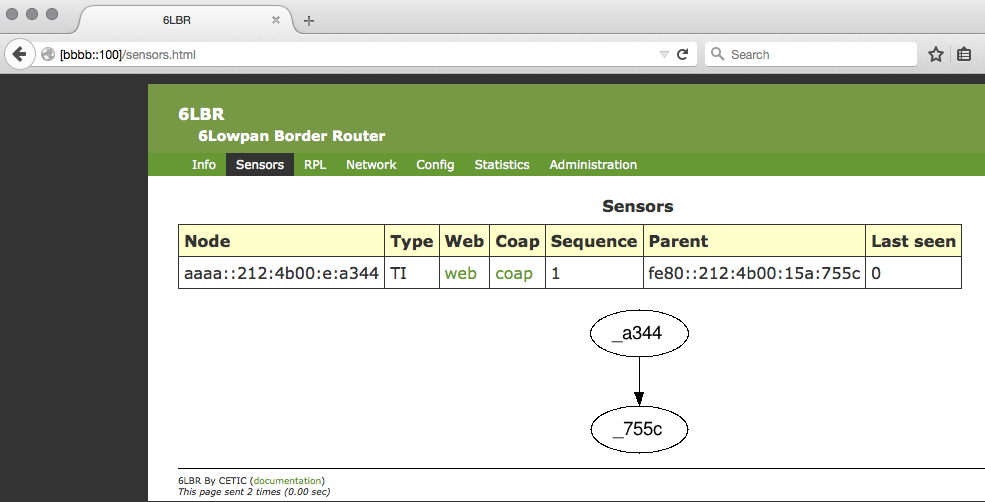
6lbr Client
This will periodically send a UDP packet to your 6lbr, containing network information, which will be used by 6lbr to construct a network graph. To see this in action, fire up a browser and navigate to the 6lbr web page. The default address is http://[bbbb::100]. Once the page loads, click the ‘sensors’ tab, as per the image below.
CoAP Server
For this functionality to work, you will need to install a CoAP client. You can achieve this by following the guides on how to set up your system in the documentation.
You should start by sending a CoAP GET request for the .well-known/core
resource. If you are using libcoap’s CoAP client, this can be achieved by:
coap-client -m get coap://[<device IPv6 address here>]/.well-known/core
Adjust the above command to match the command line arguments of your CoAP client.
The Device will respond with a list of all available CoAP resources. This list will be different between the various CC13x0/CC26x0 boards.
Send a CoAP GET request for any of those resrouces to retrieve its value.
Send a CoAP POST to the lt/g or lt/r to toggle the green/red LED
respectively.
You can also use CoAP to enable/disable BLE advertisements! This can be done
by sending a PUT or POST request to the dev/ble_advd resource. Your request
should contain the desired payload, which can be:
mode=on|offname=<name>interval=<secs>
or a combination of the above delimited with an amp. For example, you can set
as payload mode=on&name=My CC26xx Device 4&interval=5.
Bear in mind that you must set name at least once before enabling BLE
advertisements. If you fail to do so, the RF will refuse to enter BLE mode and
the CoAP engine will return 4.03 forbidden. The values of name and interval
persist across BLE on/off cycles, so you only have to set them once. The values
do not persist through device powercycles.
HTTPD
Back on the 6lbr page, hit the ‘web’ link corresponding to your device. This will take you to a web page served by the CC26xx. The HTTPD serves two pages:
index.html: Provides sensor readings and network information
config.html: Can be used to configure the MQTT client (more below)
In the navigation bar at the top there is also a third link, which will take you directly to your device’s page on IBM’s quickstart service.
IBM Quickstart / MQTT Client
The MQTT client can be used to:
Publish sensor readings to an MQTT broker.
Subscribe to a topic and as a result receive commands from an MQTT broker
The device will try to connect to IBM’s quickstart over NAT64, so you will need a NAT64 gateway in your network to make this work. A guide on how to setup NAT64 is out of scope here. If this is not an option for you, you can configure the device to publish to a local MQTT broker over end-to-end IPv6. See below on how to change the destination broker’s address.
By default the device will publish readings to IBM’s quickstart service. The publish messages include sensor readings but also some other information such as device uptime in seconds and a message sequence number. Click the “IBM Quickstart” link in the web page to go directly to your device’s page on Quickstart. After a few seconds, you will see something like this:
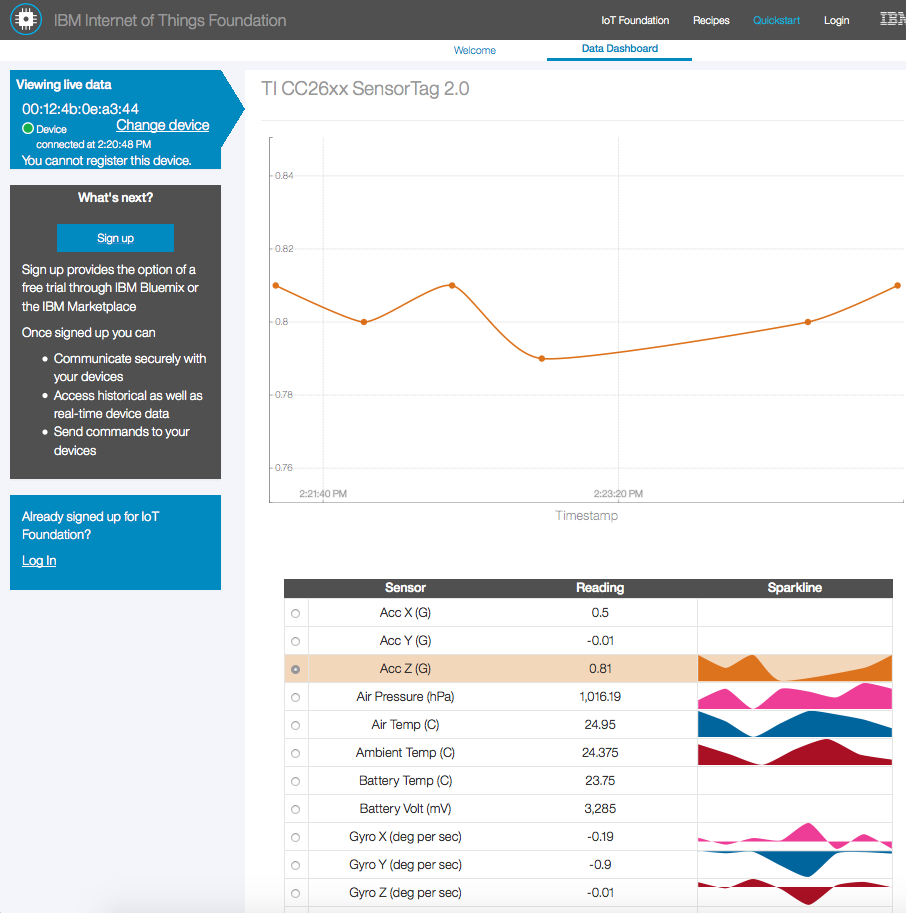
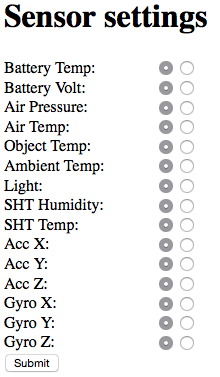
Sensor readings are only published if they have changed since the previous reading (BatMon is an exception and always gets published). Additionally, you can turn on/off individual readings from the config.html web page, as per the figure below.
Some of the MQTT client functionality can be configured even further:
You can change the broker IP and port. This is useful if you want to use your own MQTT broker instead of IBM’s quickstart. The example has been tested successfully with mosquitto
You can change the publish interval. Recommended values are 10secs or higher. You will not be allowed to set this to anything less than 5 seconds.
If you want to use IBM’s cloud service with a registered device, change ‘Org ID’ and provide an ‘Auth Token’, which acts as a ‘password’, but bear in mind that it gets transported in clear text, both over the web configuration page as well as inside MQTT messages.
The remaining configuration options are related to the content of MQTT messages and in general you won’t have to modify them.
For the SensorTag, changes to the MQTT configuration get saved in external flash and persist across device restarts. The same does not hold true for Srf+EM builds.
You can also subscribe to topics and receive commands, but this will only work if you use “Org ID” != ‘quickstart’. Thus, if you provide a different Org ID (do not forget the auth token!), the device will subscribe to:
iot-2/cmd/+/fmt/json
You can then use this to toggle LEDs or to turn the buzzer on and off.
The buzzer is only available on the SensorTag. To do this, you can for example
use mosquitto client to publish to iot-2/cmd/leds/fmt/json. So, to turn
the buzzer on, you would do this:
mosquitto_pub -h <broker IP> -m "1" -t iot-2/cmd/buzz/fmt/json
Where broker IP should be replaced with the IP address of your mosquitto
broker (the one where you device has subscribed). Replace -m "1' with -m "0"
to turn the buzzer back off. Replace buzz with leds in the topic to change
the state of the LED.
Bear in mind that, even though the topic suggests that messages are of json format, they are in fact not. This was done in order to avoid linking a json parser into the firmware.
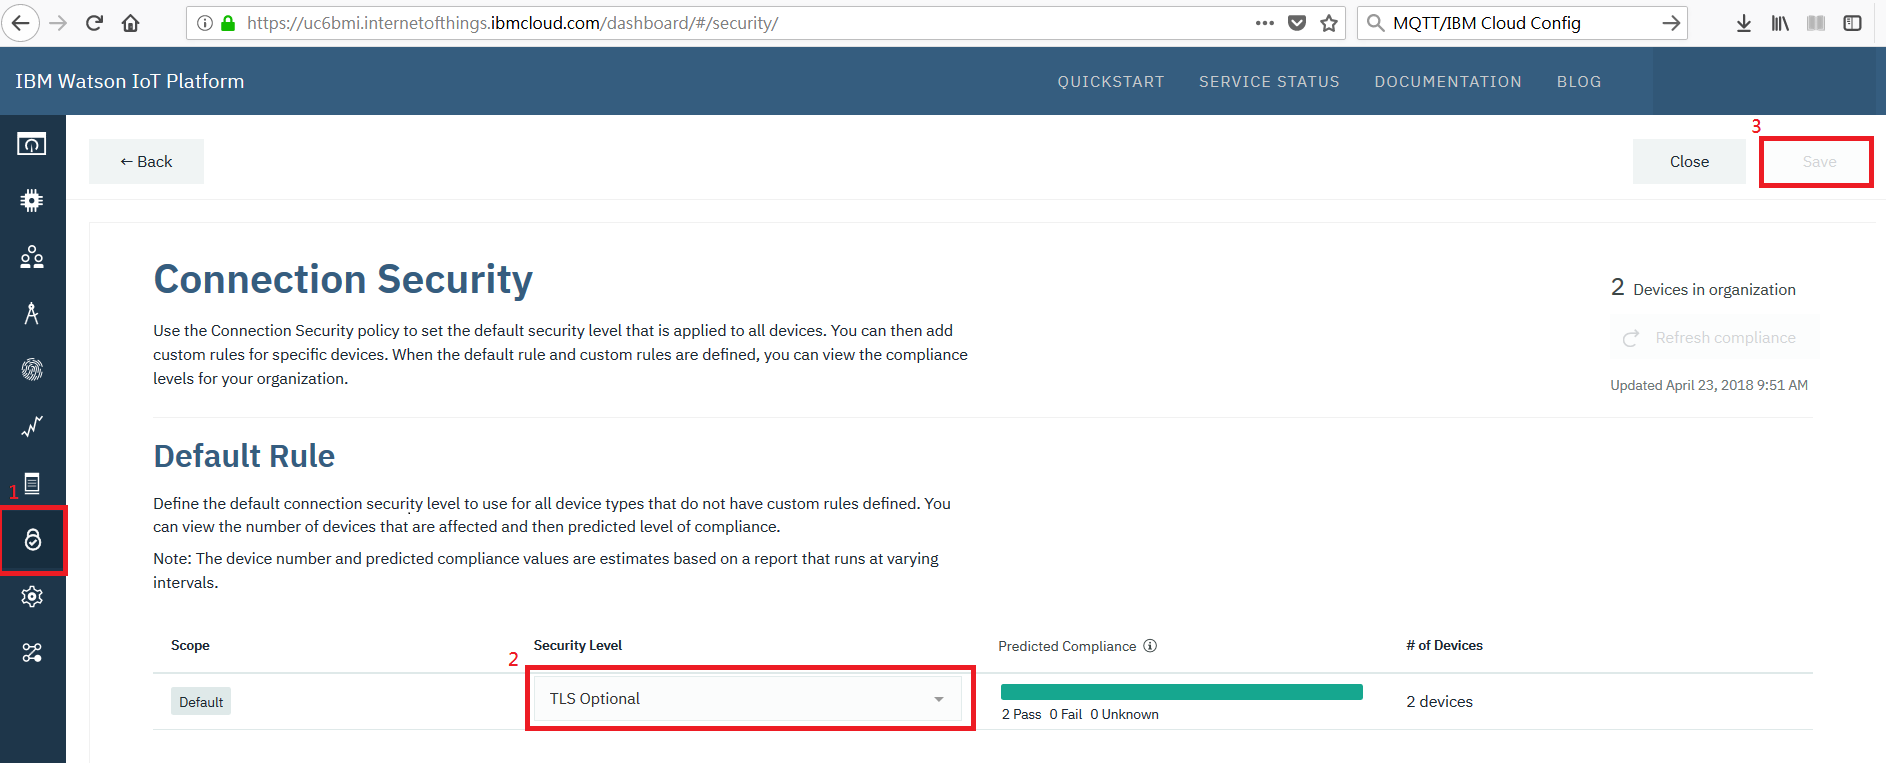
IBM Watson IoT Platform
To use IBM Watson IoT Platform, you have to go to SECURITY tab of Device page to select “TLS Optional”. This step is critical. If you don’t do this, you need to use TLS for connection and default cc26x0-web-demo won’t work.